Handover to an agent
This feature is only available in STANDARD and PRO package.
Have you set up your chatbot but still receive a lot of irrelevant or repetitive queries? Would you like to encourage your customers to find the answers in the chatbot and contact you only if they have more complex questions?
With the new chatbot feature that allows transferring messages from a bot to an agent, you'll receive only relevant questions from visitors who have the potential to become customers.
How does it work?
First, you turn off the text field in the chat box. Then, choose specific buttons in your chatbot that will be used to transfer the conversation to an agent. When a visitor clicks on one of these buttons, the text field will reappear again and they'll be able to contact you via live chat. At the same time, you'll receive a notification in the dashboard to inform you that there's a customer who would like to talk to you.
This will encourage visitors to explore the chatbot first before contacting you. Most of the visitors that will then come to you will be asking relevant questions about your products or services and you can easily turn them into happy customers.

How to set it up?
Turn off the text field in the chat box
Let's start by going to the chatbot garage and creating a new chatbot or opening an existing one. If you're not sure how to create a chatbot, check out our tutorial and you'll know everything you need in no time. :)
Once you open your chatbot, go to the 'Settings' section.
Here, select the category 'Behaviour' and then tick the option 'Disable text field in chat box'. Don't forget to save your changes.
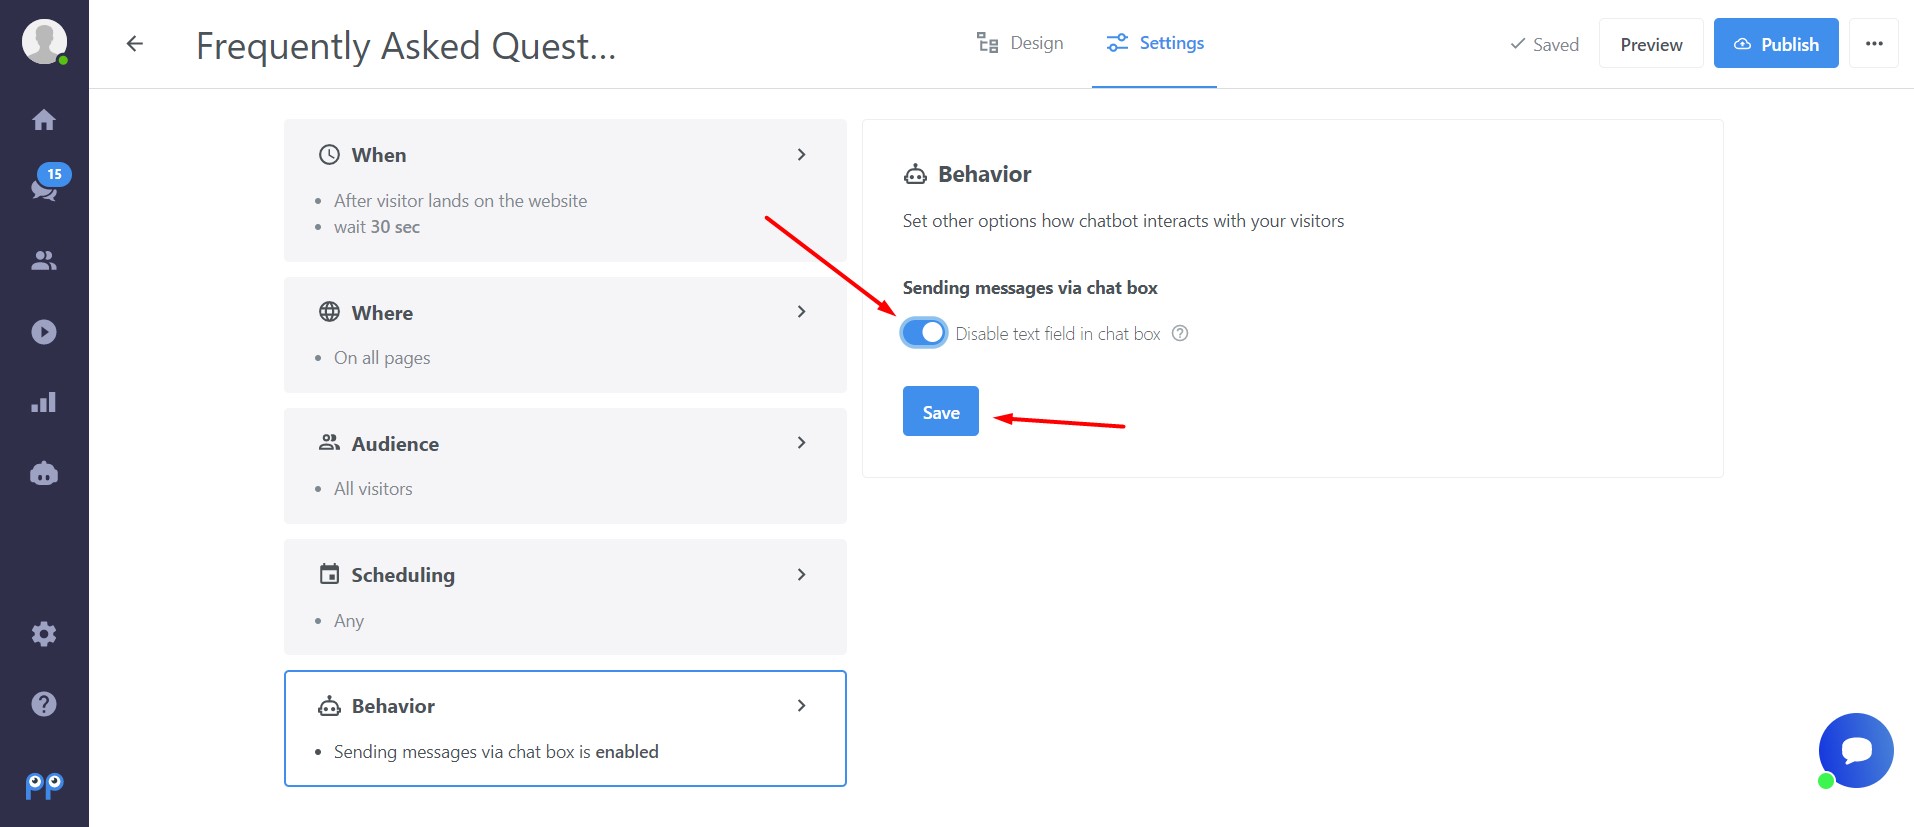
Note: We recommend setting up the chatbot to appear either when a visitor clicks on the chat box button or 1 second after the visitor enters the website.
In the section 'When', choose either the option 'after the visitor lands on the website' or 'after visitor clicks the chat box button' (If you want to display the chatbot immediately, set the delay to 1 second.)
This prevents the possibility of the text field being visible before the chatbot is launched.
It's up to you whether you decide to add other conditions to your chatbot. For example, you can display chatbot only on a specific page, or to a specific audience, etc. ... If you'd like to learn more about chatbot conditions and how to set them up, you can check out our detailed tutorial.
Add the option to transfer the conversation to an agent

Now, we can move on to learning how to transfer conversations from a chatbot to an agent. First, we recommend creating all the branches and replies in your chatbot where you want to disable chat. You can take inspiration from our chatbot template specially made for e-commerce.
TIP: For example, you can create a set of questions and answers to common queries like shipping or payment, offer discounts, inform visitors about seasonal events, or create a shopping guide to help customers find the product they're looking for.
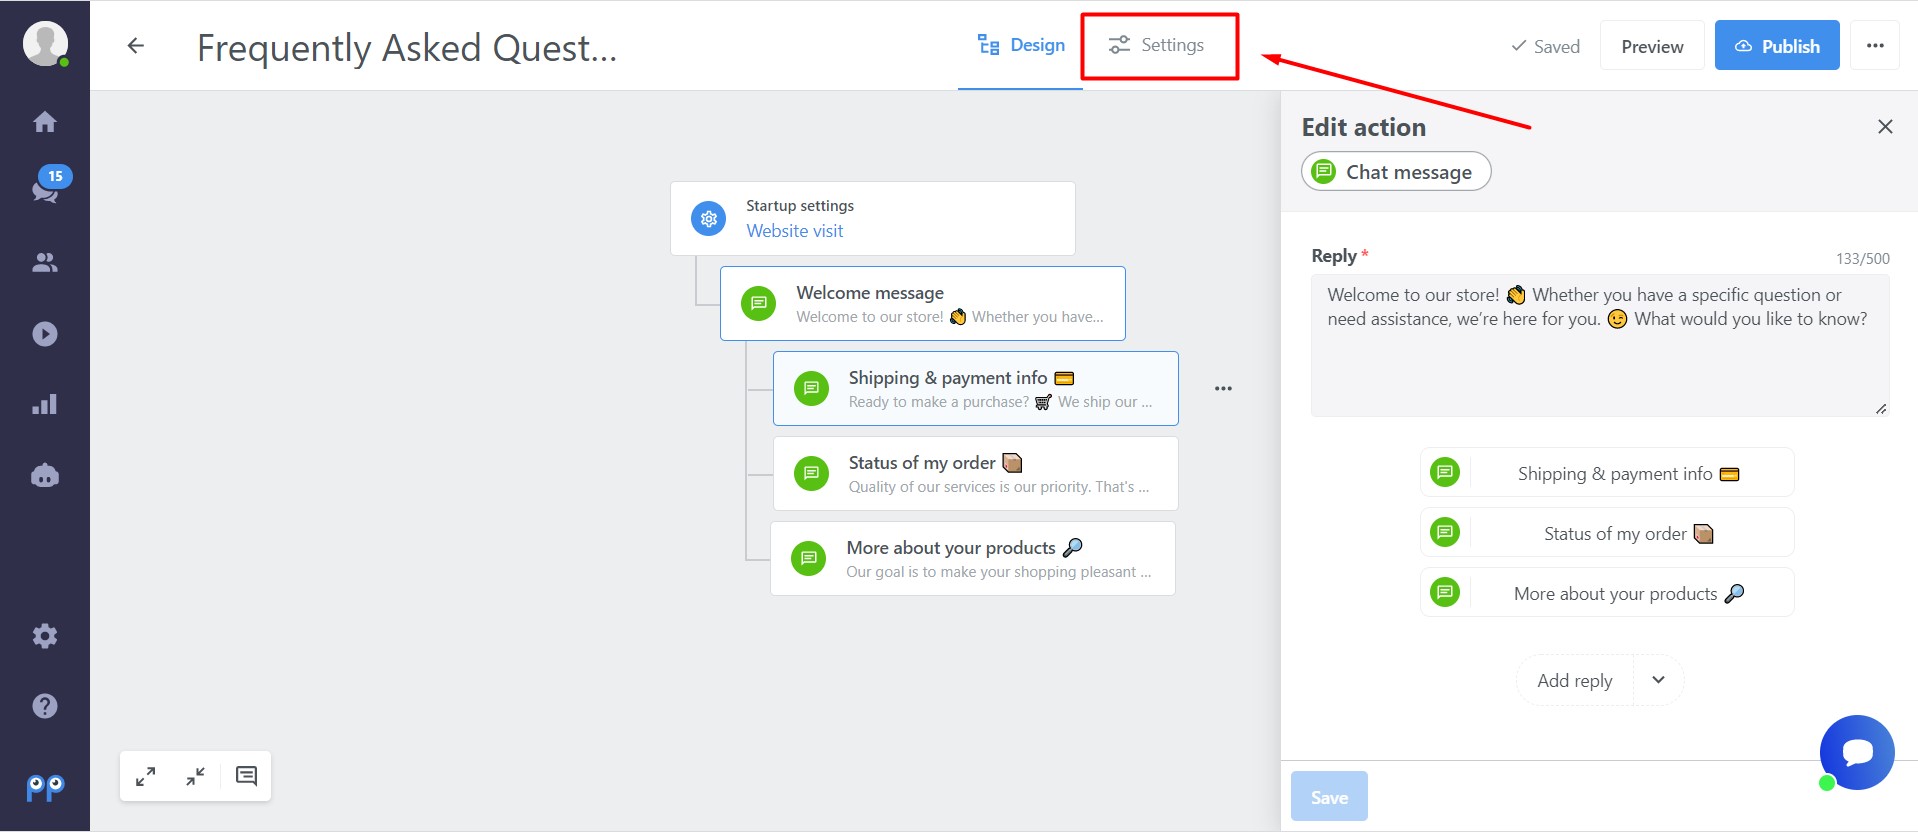
Once you're finished, you can start adding buttons that will serve to contact the agent. Choose a branch or multiple branches that you want to end with the option to transfer the conversation to an agent. Click on the last message in that branch, select 'Add Reply', and then choose 'Connect with agent'.

Finally, just type the title of the button such as: 💬 I'd like some advice
And prepare a response that the visitor receives after they click on the button. It can be for example something like:
We'll be happy to talk with you right here on chat and help you resolve any issues you may have. Please wait a moment and we’ll get right back to you. 😉 In the meantime, feel free to let us know how we can help you.
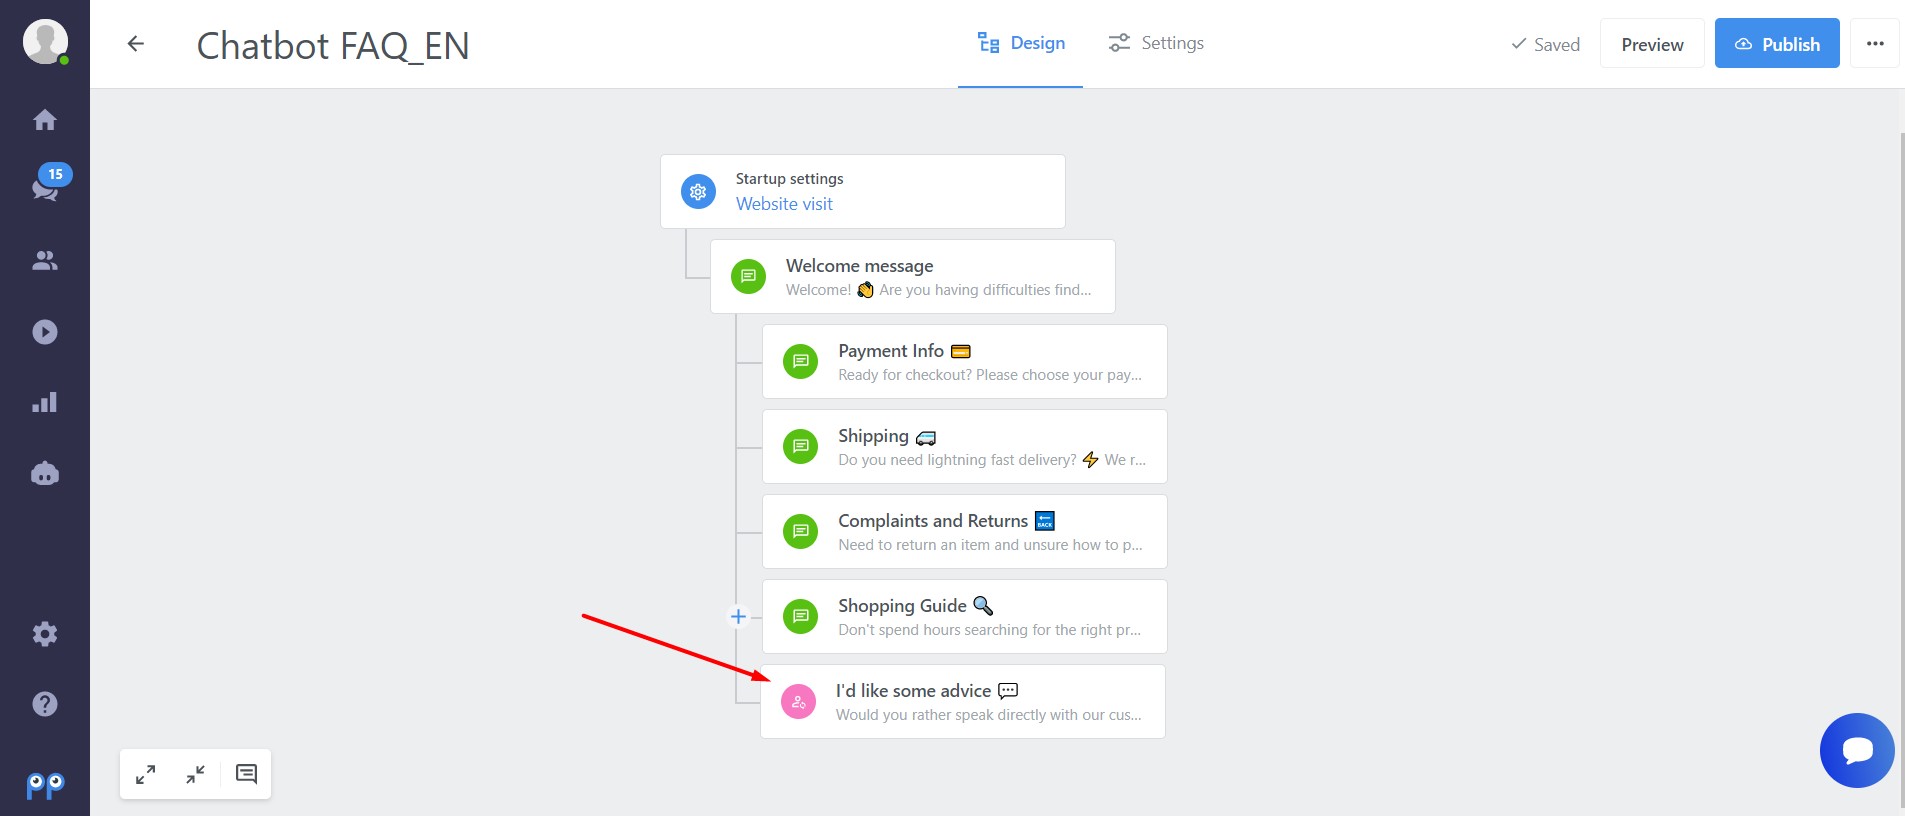
You can do the same for any other branches that you want to end with the option to switch the conversation to an agent. In the tree structure of your chatbot, you can easily recognize these options by the pink icon.
If you'd like to see whether your chatbot looks the way you wanted to, click on the 'Preview' and you'll be able to check what the chatbot will look like on your website once it's published.
Multiple chatbots behavior:
- in case you are using chatbots with disabled text area (DTA) the other automation (chatbots and automatic messages) is triggered also
- if you have more chatbots with DTA with various delay, once the visitor clicks on the chat box button they will all trigger
- if you have a chatbot with enabled text field (ETA) and the other one with disabled one, the activation of text field depends on which chatbot the visitor was clicking on (chatbot with disabled text field / no text field activation, chatbot with enabled text field / text field activation)
Tricks how to work with multichatbots
- let the chatbots with disabled text field go as the first ones, you can set up more conditions for chatbots with enabled text field after
- target the chatbots with disabled text field to subpages
- you can use also the feature routing between chatbots to simplify the flow
- make sure the delay between chatbot is high enough
Handover to email
This feature allows each conversation to be handed over to a designated email address, such as your agents’ email or a ticketing system. When setting up your chatbot with a handover node, you can choose whether the conversation should be handed over to an agent or an email address. This option can be configured for both online and offline statuses.
Steps to Configure:
- Go to the Automations tab and select or create a chatbot that includes a handover node.
- For each status, select the Forward conversation to email option and enter a single email address.
- You can also write short messages for each status mode.
-
Save and publish your chatbot.
You will now receive conversations for the selected chatbox status in your email.
You can access the visitor's conversation in your inbox using the 'Conversation Detail' button. The conversation will be available 2 minutes after the visitor ends the session.
After the e-mail is sent, the visitor will be able to start a new conversation and repeat the process 3 times per hour. You will also be able to reply to these messages directly via email.
See below how it appears from the visitor's side.
Note: This feature does not support the option to automatically add tags.
Note: Groups are not added to conversation while only handover-email flow is activated.