Info: This feature is only available in STANDARD and PRO packages.
Note: Only the new widget version 3 supports Google Analytics 4.
Turn Google Analytics on in the Smartsupp dashboard
You can measure the impact Smartsupp has on your conversion rate and visitor behavior in Google Analytics. You can set up if you'd like to send the data to your Google Analytics or not in your account.
Open the section Settings > Integrations > Google Analytics > Click Connect button
When you activate the Google Analytics integration you will see 2 options.
-
Auto-detect Measurement ID
- It'll automatically detect all Measurement IDs on the webpage and use it to send Smartsupp events to Google Analytics.
- When you only use 1 Google Analytics account, select this option. For most people, this is the best option.
-
Manually define Measurement ID
- In case you use multiple Measurement IDs, select which Measurement ID you'd like to use for tracking Smartsupp events. This option won't work if you've previously activated the integration with Google Analytics via API following this tutorial.
- If you have a more advanced use case and are using multiple Google Analytics accounts on your website, you can choose which Google Analytics account we should send events from Smartsupp.
Select which one is best for you and click save. From now on, Smartsupp will be sending events to your Google Analytics 4. There is one more step to get the full picture of how Smartsupp is impacting your goals.

Define the custom definitions
For the complete picture, you need to go to your Google Analytics 4 property and define 2 custom dimensions. Don’t worry, it is very easy.
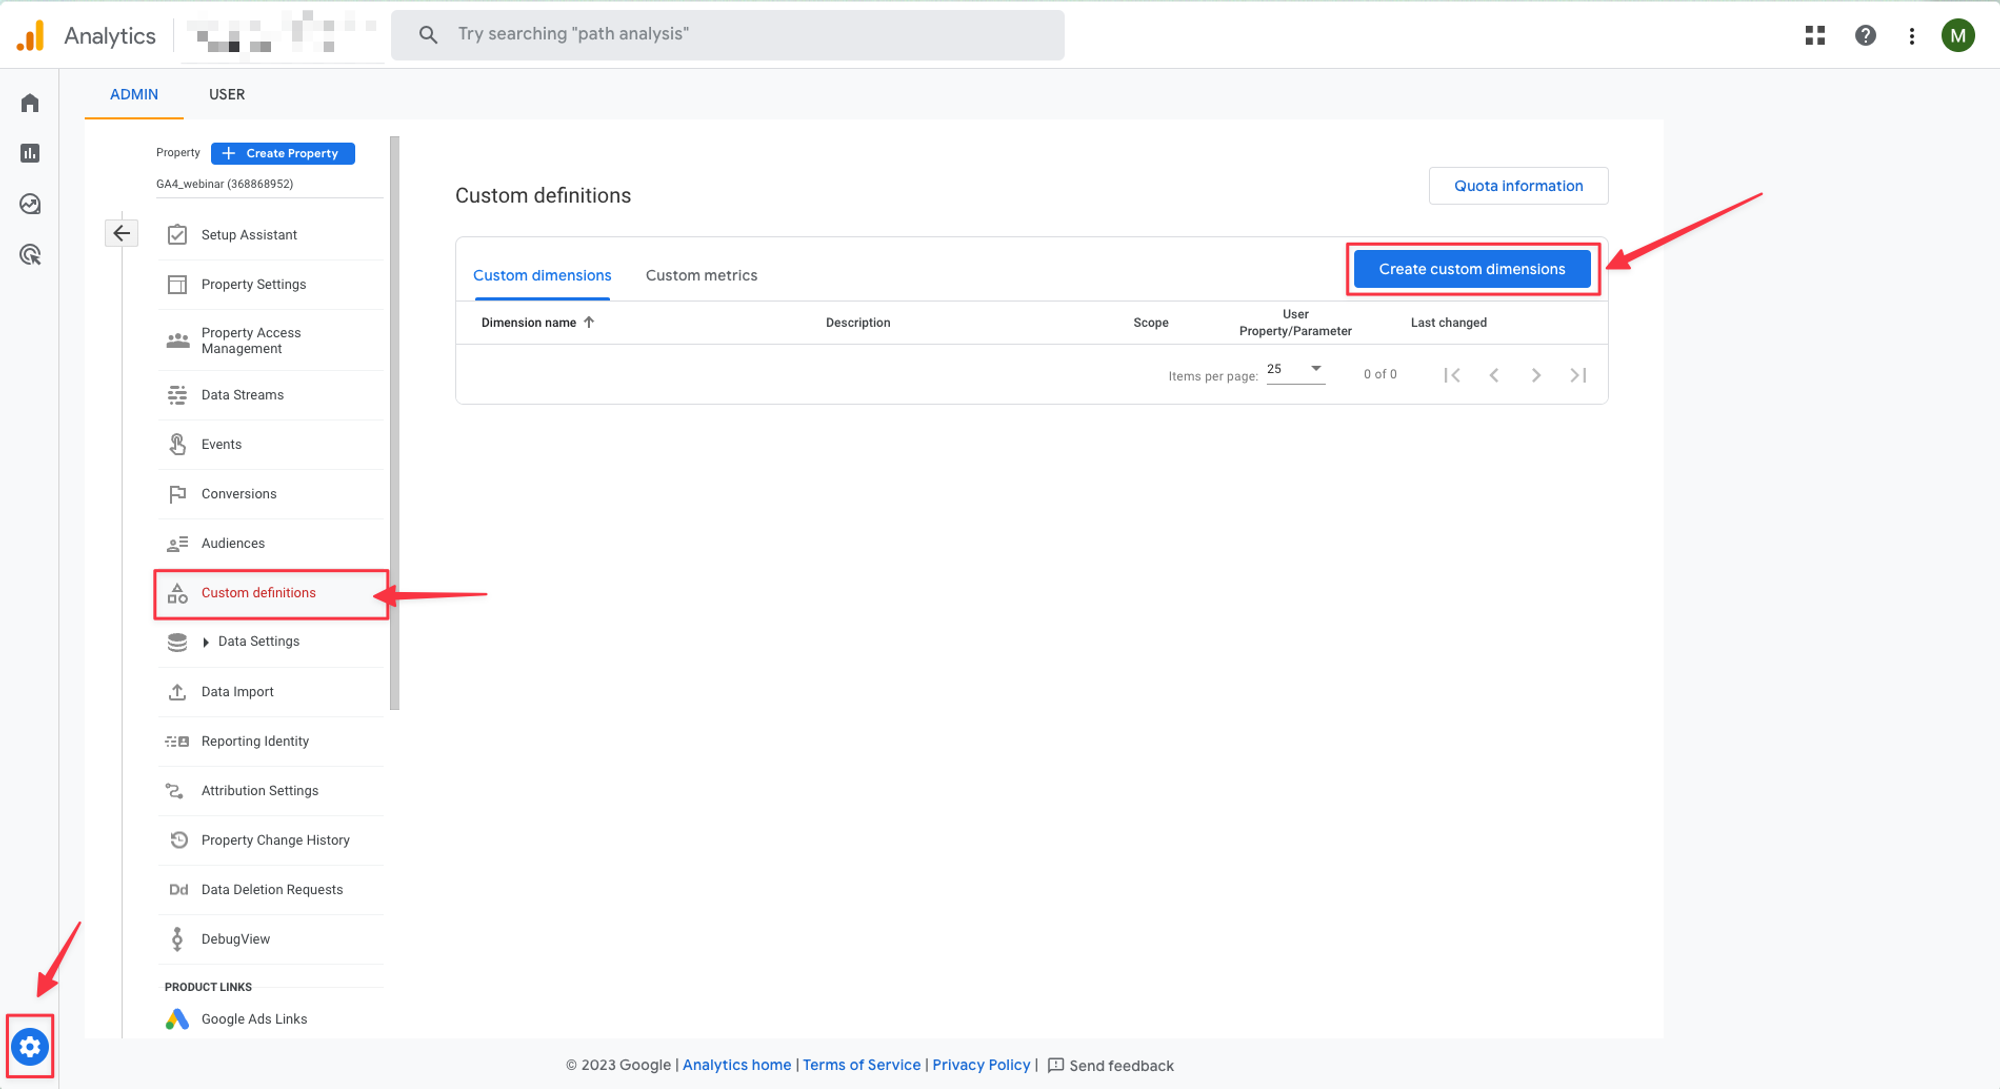
Open your Google Analytics 4 property > Click on admin > Click custom definitions > Click on Create a custom dimension
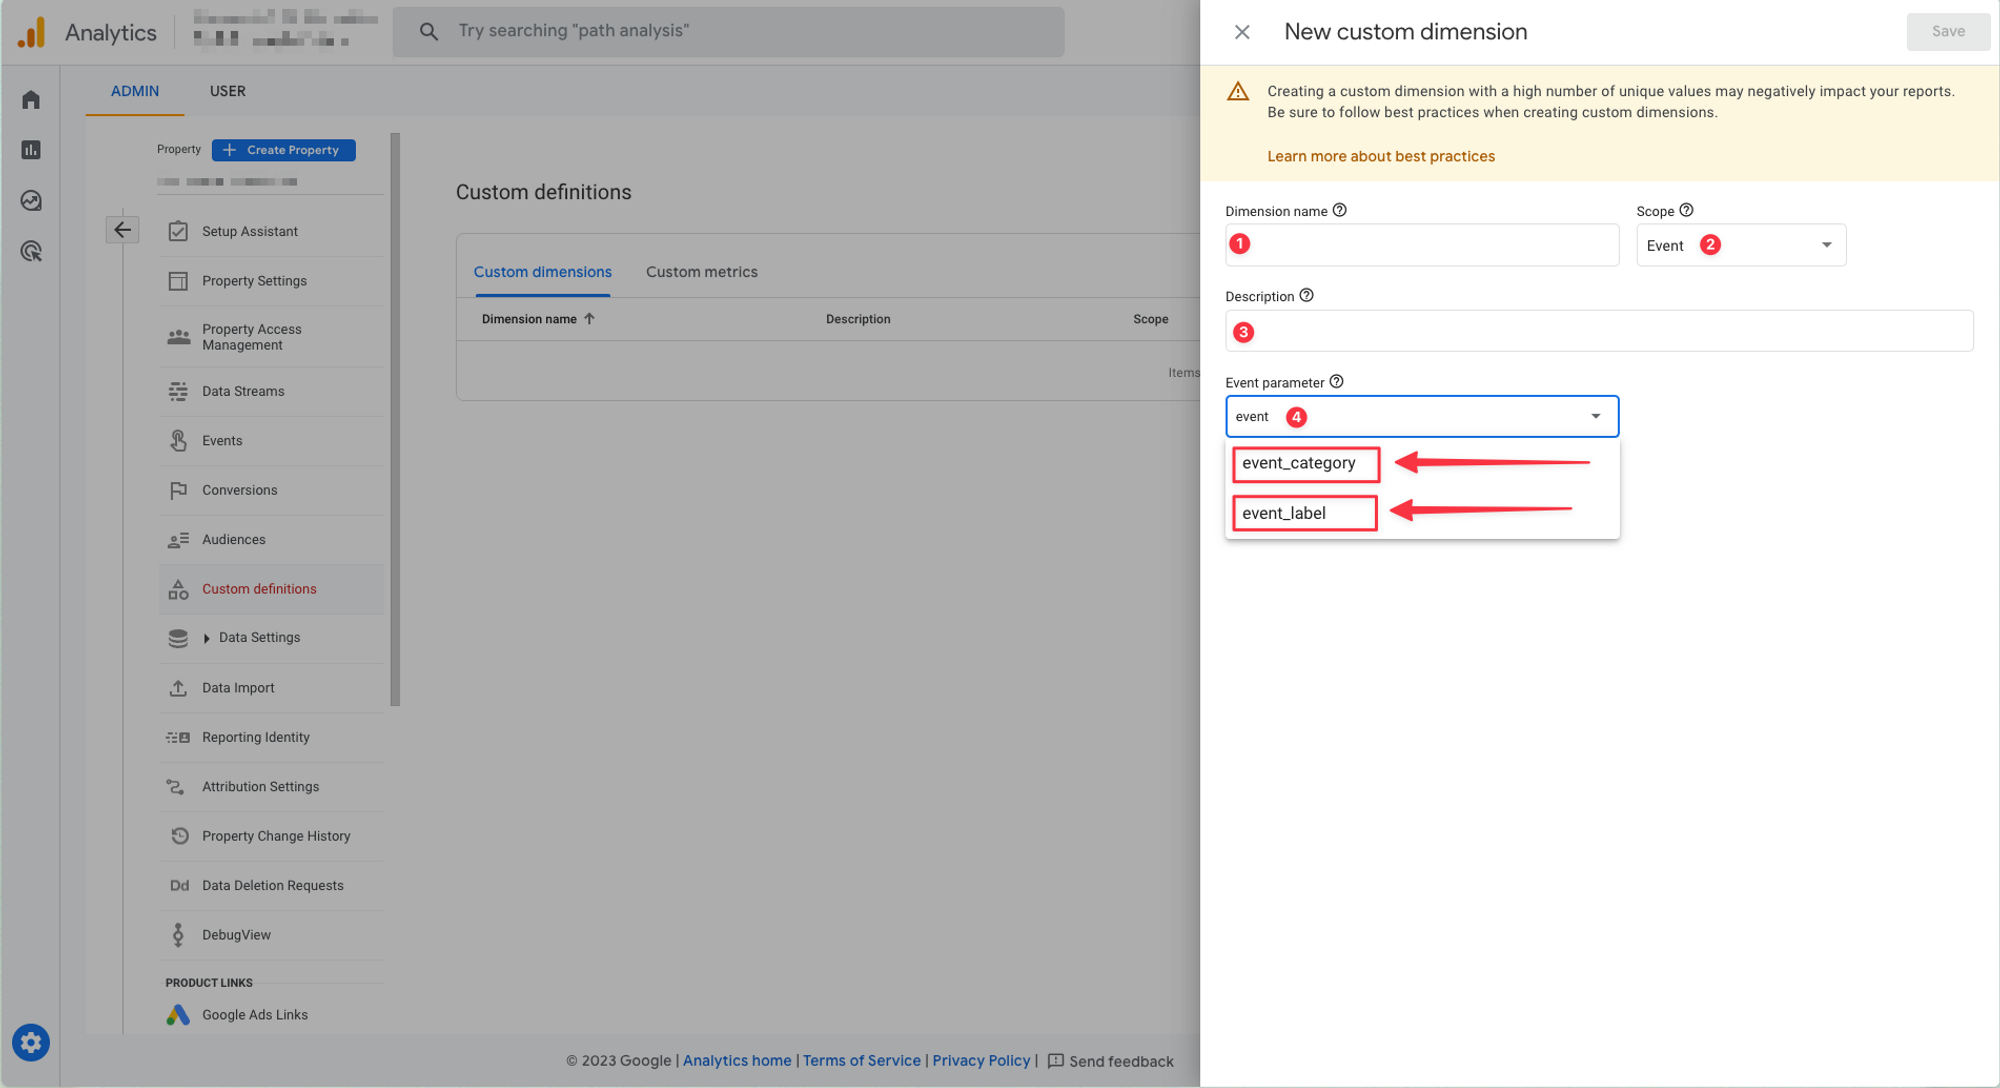
Now you need to add 2 custom definitions
Event category
- Now type in the dimension name. This can be custom, but we recommend naming it: event_category
- Scope: make sure this is set to Event
- Give your custom definition a description. Again this is up to you. We recommend something along the line of the Smartsupp event category.
- Pick an event parameter. Make sure you pick event_category
Note: If you do not see event_category, it is either already defined or Google Analytics has not yet received any event from Smartsupp. You can still define it
Event label
Now you need to repeat the process for the event_label dimension.
- Dimension name: event_label
- Scope: Event
- Description: Smartsupp event label
- Event parameter: event_label
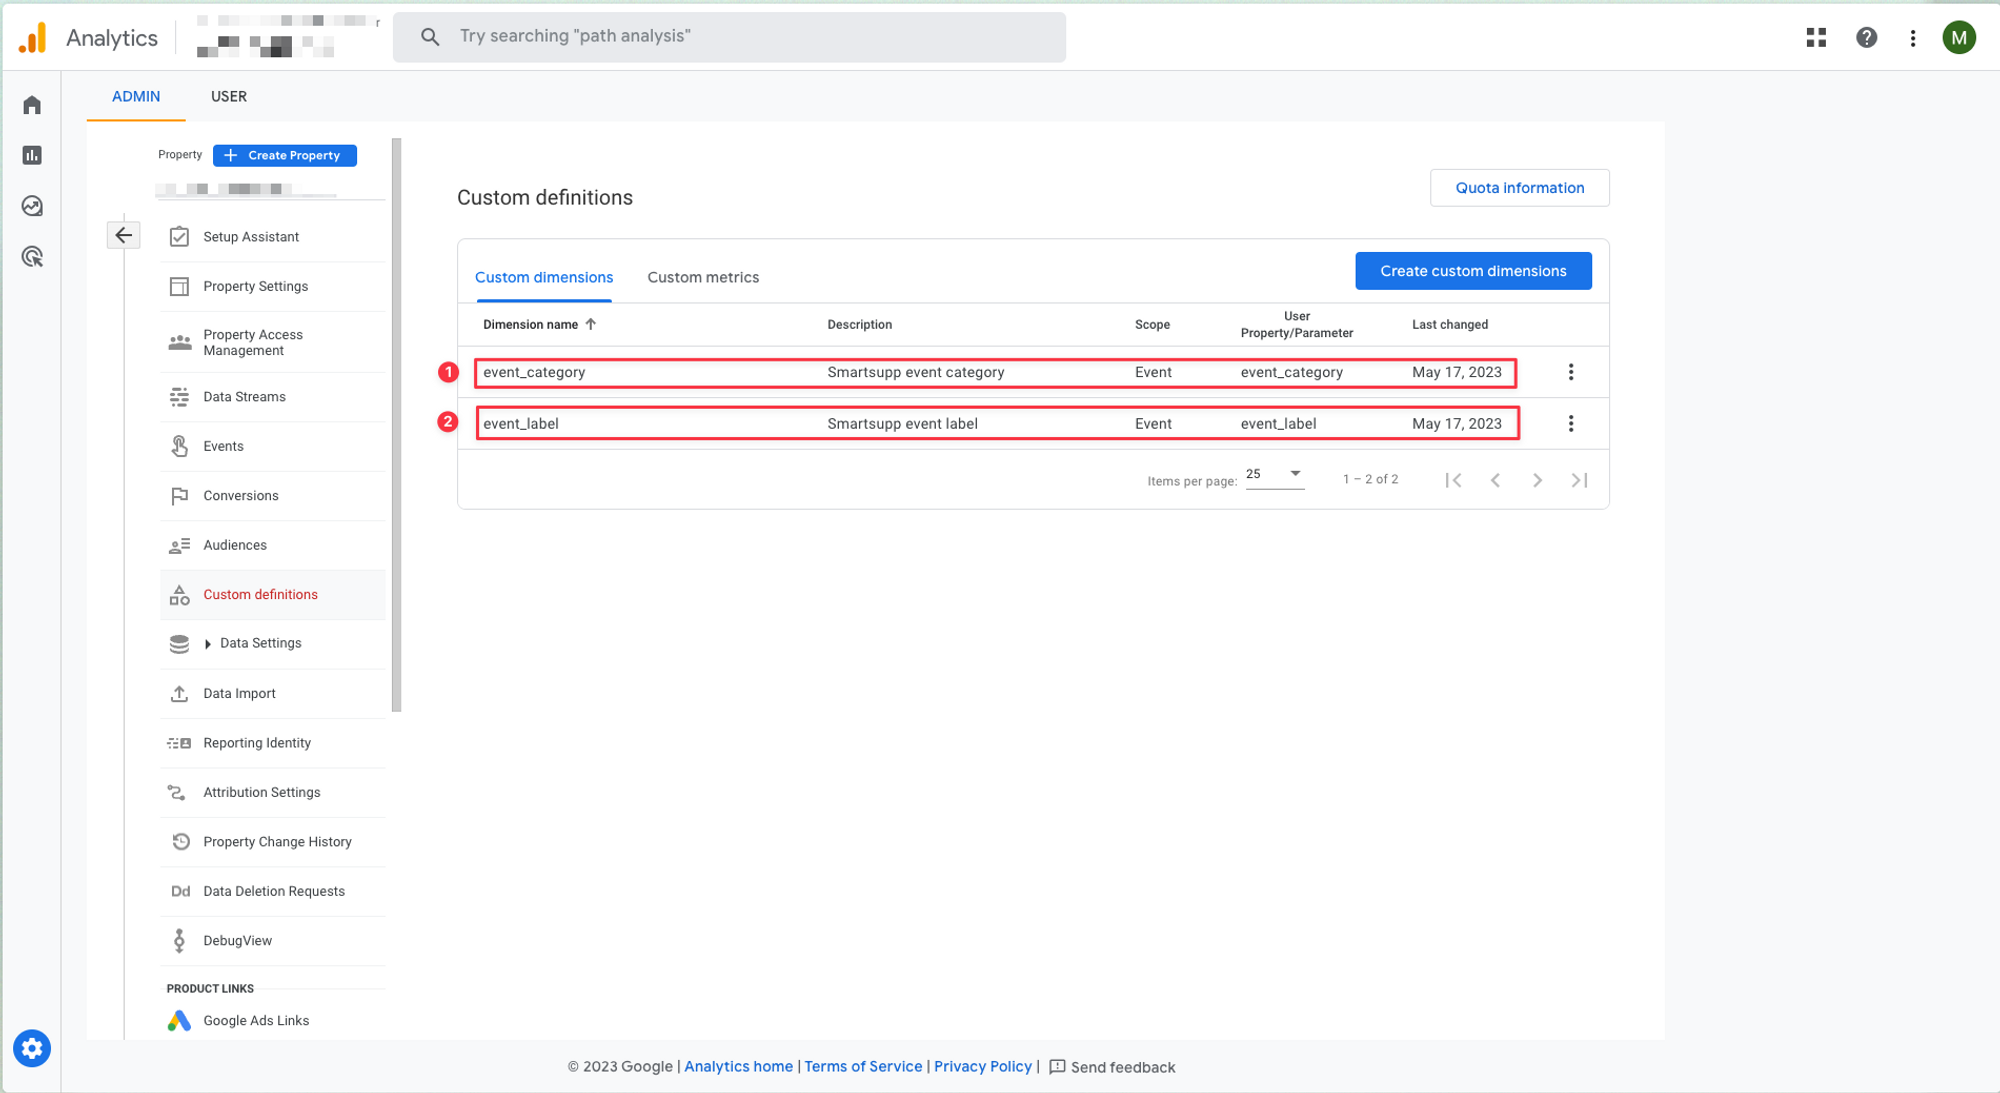
You should end up with at least 2 dimensions defined, there can be more dimensions, but to track events from Smartsupp in Google analytics 4 properly, these 2 must be defined in the settings.
Note: Please double check if you don’t have hard coded ga.key in the Smartsupp snippet.
How to measure impact of Smartsupp in your Google analytics
Please find the detailed tutorial here.