Who are agents?
Agents are the most important part of every live chat. They are people, who are communicating with visitors on your website. They answer questions or help your visitors to find the product they are looking for. But, before they can chat with your visitors, you need to create access for them in your Smartsupp account. In this tutorial, we will show you how to add new agents.
How to invite new agents?
Inviting a new agent is simple. Just go to Settings → Agents and click on the Invite button.
You fill in the agent’s email address and they will receive the invitation by email. The invitation link will remain active for 7 days. After accepting the invitation, the agent will be redirected to our Smartsupp page where they will need to enter their name as agent and create a new password.
Note: If you are already logged in to Smartsupp, the invitation will redirect you to the dashboard. If you want to accept the invitation and you are already logged in, it is necessary to log out or to open the invitation in another browser.

Are you unable to invite the agent?
It’s not possible to invite an agent who already has their own Smartsupp account.
If you’d like to invite them, they can either delete their existing account, accept your invitation, and create a new one — or you can invite them using a different email address.
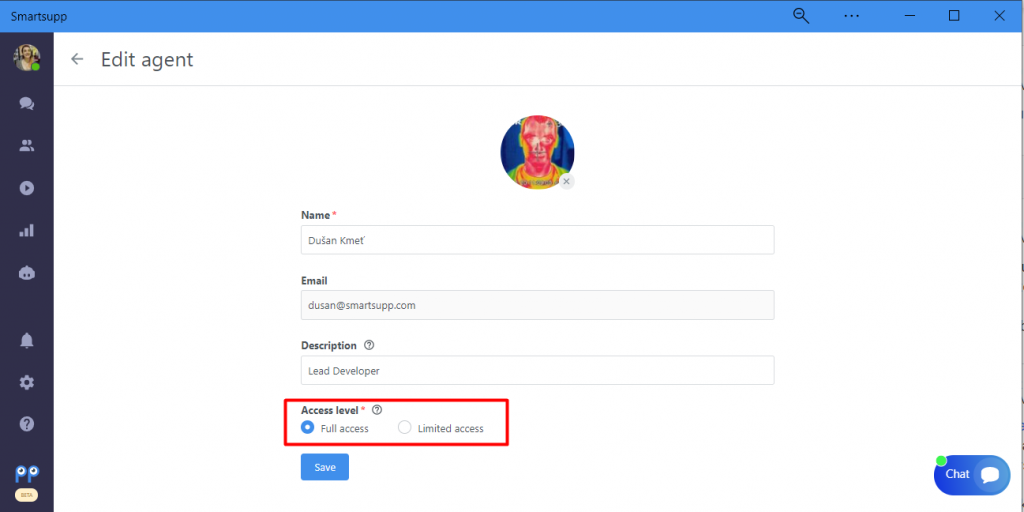
Edit agent info and access
To edit the agent’s information (name, email, description), you click on the three dots in the arent’s row and choose Edit agent.

You can also change the agent's access level in the same place.
- Full access – This agent can access all personal and company settings, including billing info/details. They can also chat with visitors. Recommended only for senior employees or management.
- Limited access – This agent can only access conversations, visitors and personal settings (i.e., their profile, shortcuts, notifications). They can also chat with visitors.
How to activate/deactivate agents?
After you create agents, you still need to permit them, whether they can chat with your visitors or not. There are two types of agents based on this:
- Active agent – This agent can chat with your visitors. Only the active agent can edit automatic messages and chatbots.
- Inactive agent – This agent can access only statistics and settings, but can’t communicate with visitors on your website. Ideal for management, or owner, to check the statistics of agents, change settings, or access billing.
So, how can you activate or deactivate agents? Just slide the button to the right (activate) or to the left (deactivate).

How many agents can I add?
The number of agents depends on your package. To see how many Agents you have or to add more, please visit the Billing section or contact our support team via the chat widget in your dashboard.