
Blogger (Blogspot) is Google's free blogging platform that lets you edit your theme's HTML directly. This guide shows you how to add the Smartsupp live chat and Flow (formerly chatbots) widget to your Blogger site in a few steps.
We've broken the guide into the following sections:
Copy the Smartsupp code
Log in to your Smartsupp dashboard and go to Settings > Chatbox > Installation > Insert code. Copy the entire code snippet.
Paste the code into Blogger
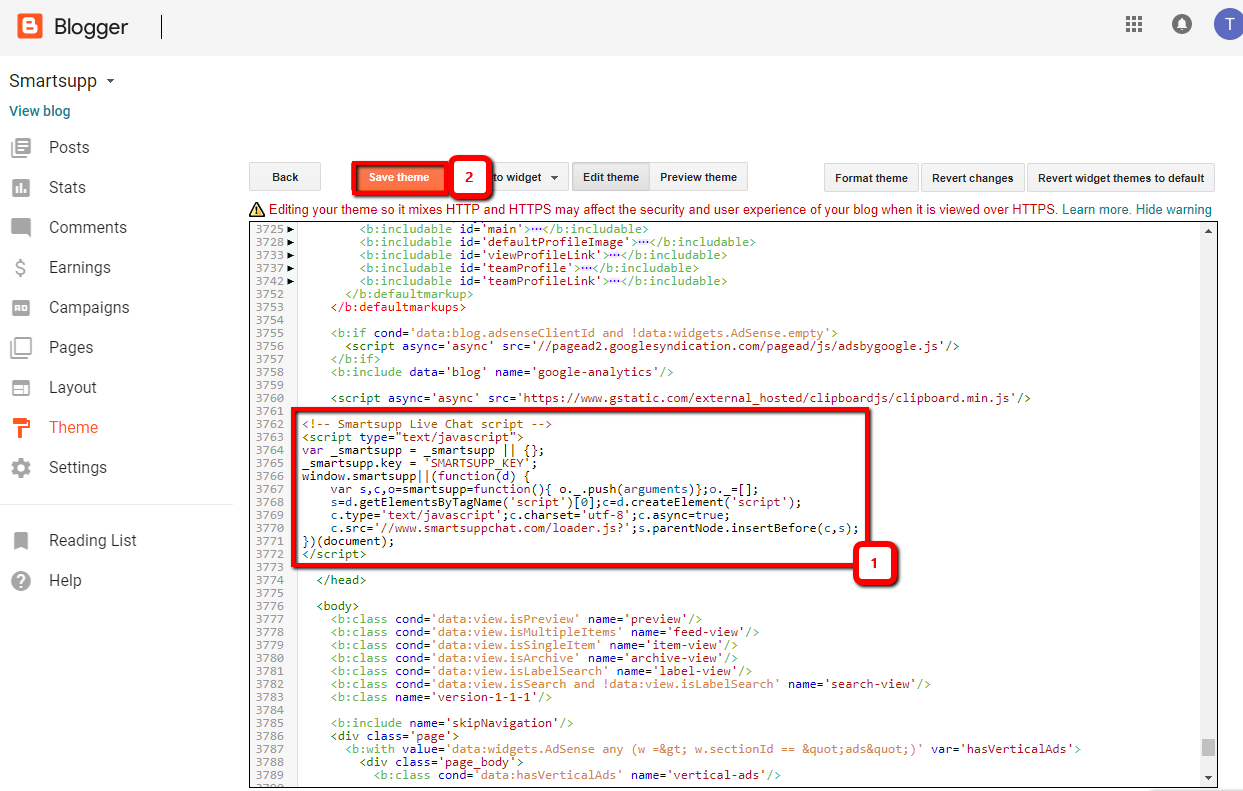
In your Blogger dashboard, open Theme and click the arrow next to Customize to open Edit HTML. Find the closing </head> tag and paste the Smartsupp code just before it. Click Save to apply the changes.

Verify the installation
Open your Blogger site in a new browser tab and refresh the page. The Smartsupp chat widget should now appear in the corner of your site.
Tip: If the chat widget doesn't show up, clear your browser cache or open your site in an incognito window. Also make sure the code was saved correctly just before the closing </head> tag.
Related resources:
Smartsupp installation — full overview of all installation methods.
Why can't I see the chat on my website? — troubleshoot the most common installation issues.
What's next?
Basic chat box settings — customize colors, position, welcome messages, and more.
Chat box status — learn how the chat widget status works and how to control it.
Why can't I see the chat on my website? — troubleshoot the most common installation issues.
Download plugins — explore all available platform integrations.