
Note: Webnode allows custom code insertion only on paid plans. If you're using a free plan, you'll need to insert the code on each page individually.
Running your website on Webnode? This guide walks you through everything you need to connect Smartsupp to your site — from the premium global installation to the free per-page method.
We've broken the guide into the following sections:
Option 1: Premium Services (global installation)
If you have a Webnode paid plan (Mini, Standard, Profi, or Business), you can insert the Smartsupp code globally so it appears on all pages of your website.
Video walkthrough
Watch how to insert the Smartsupp code in Webnode:


Copy the chat code
Find your unique Smartsupp chat code in the dashboard under Settings > Channels > Live chat > Installation > Insert code.
Paste the code in Webnode
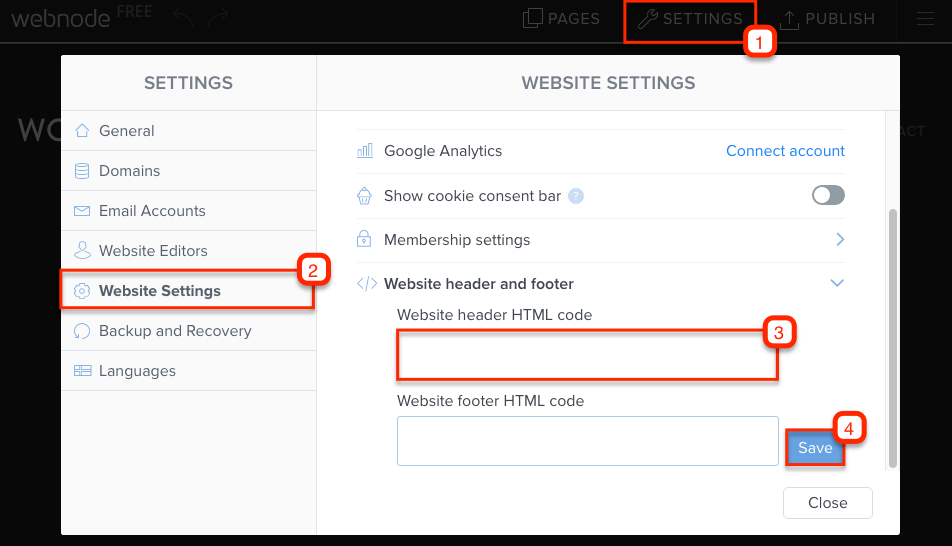
In your Webnode editor, go to Settings > Website Settings > Website header and footer > Website header HTML code. Paste the Smartsupp chat code and click Save.
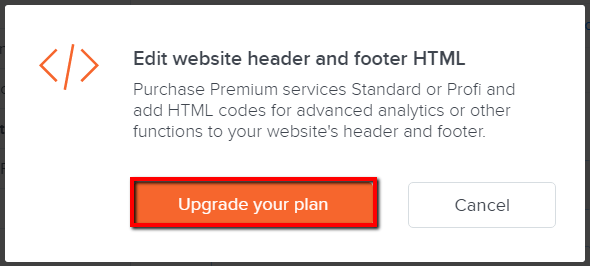
Note: If you see a prompt to upgrade your plan, it means your current Webnode plan doesn't support custom code insertion. You'll need to upgrade to a paid plan, or use the free per-page method instead.
Tip: After saving, open your website and refresh the page — the Smartsupp chat widget should now be visible on all pages.
Option 2: Free plan (per-page installation)
On the Webnode free plan, global code insertion is not available. Instead, you need to add the Smartsupp code to each page individually through the SEO settings.
Copy the chat code
Find your unique Smartsupp chat code in the dashboard under Settings > Channels > Live chat > Installation > Insert code.
Paste the code on each page
In your Webnode editor, go to Pages, select a page, then open SEO page settings > Custom HTML header code. Paste the Smartsupp code and close the dialog. Repeat this for every page where you want the chat to appear.
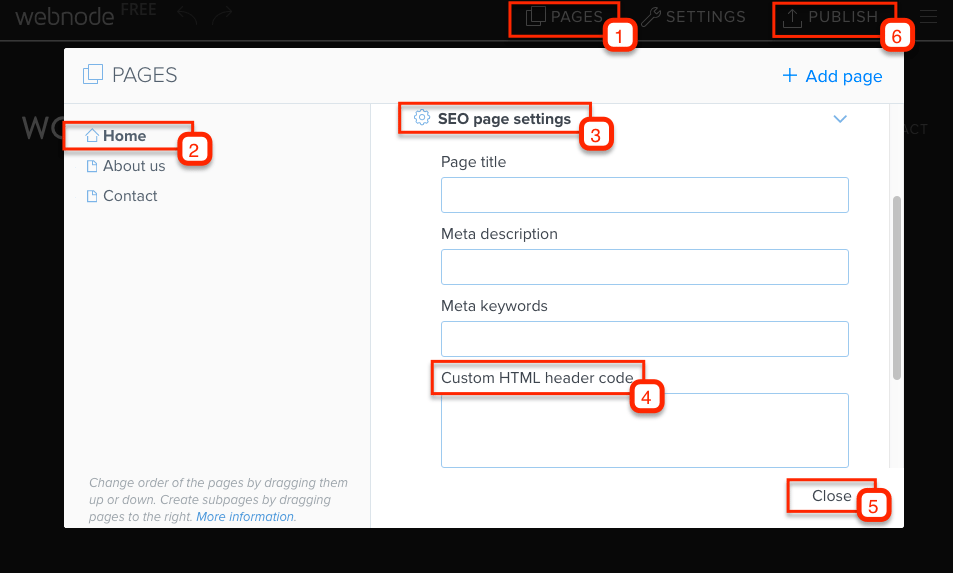
Note: Don't forget to Publish your website after adding the code to apply the changes.
Tip: After publishing, open your website and refresh the page — the Smartsupp chat widget should now be visible on the pages where you added the code.
Old Webnode version
If you're using an older version of Webnode, the code insertion works through the built-in Smartsupp integration.
In your Webnode editor, go to Contents > More > Business tools > Live chat (Smartsupp). Paste the Smartsupp code and click OK. Then Publish your website to apply the changes.

Tip: After publishing, open your website and refresh the page — the Smartsupp chat widget should now be visible.
Related resources:
Smartsupp installation — full overview of all installation methods.
Google Tag Manager — alternative installation method using GTM.
What's next?
Basic chat box settings — Customize colors, position, welcome messages, and more.
Chat box status — Learn how the chat widget status works and how to control it.
Why can't I see the chat on my website? — Troubleshoot the most common installation issues.
Download plugins — Explore all available platform integrations.