
Running your online store on Shoper? This guide walks you through everything you need to connect Smartsupp — from the one-click plugin installation to the manual code method.
We've broken the guide into the following sections:
Install the Smartsupp plugin
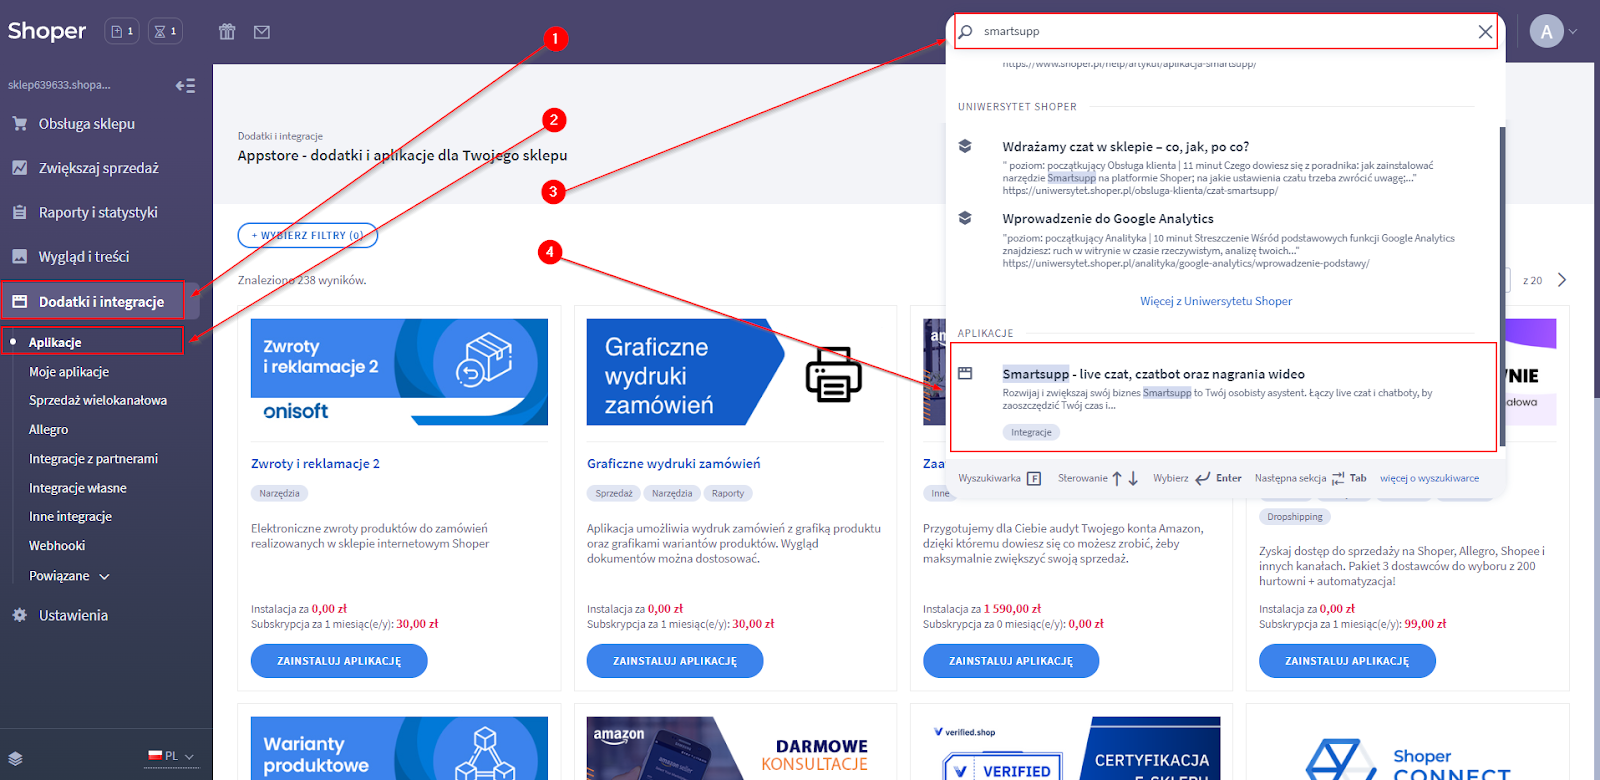
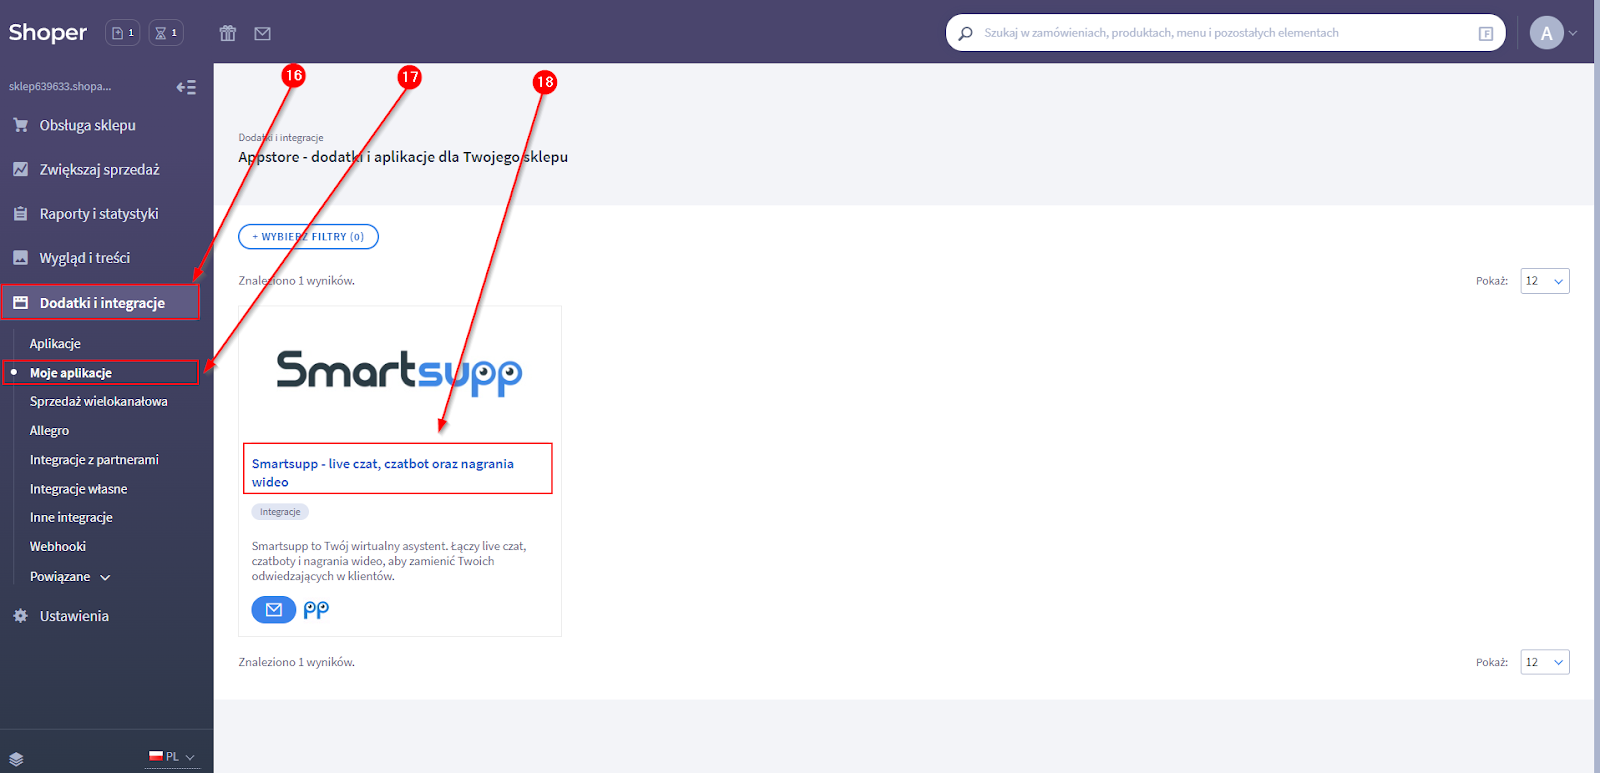
In your Shoper dashboard, go to Add-ons and integrations > Applications. Scroll down and find Smartsupp - live chat, Flow (formerly chatbots) & video recordings, then click on it.
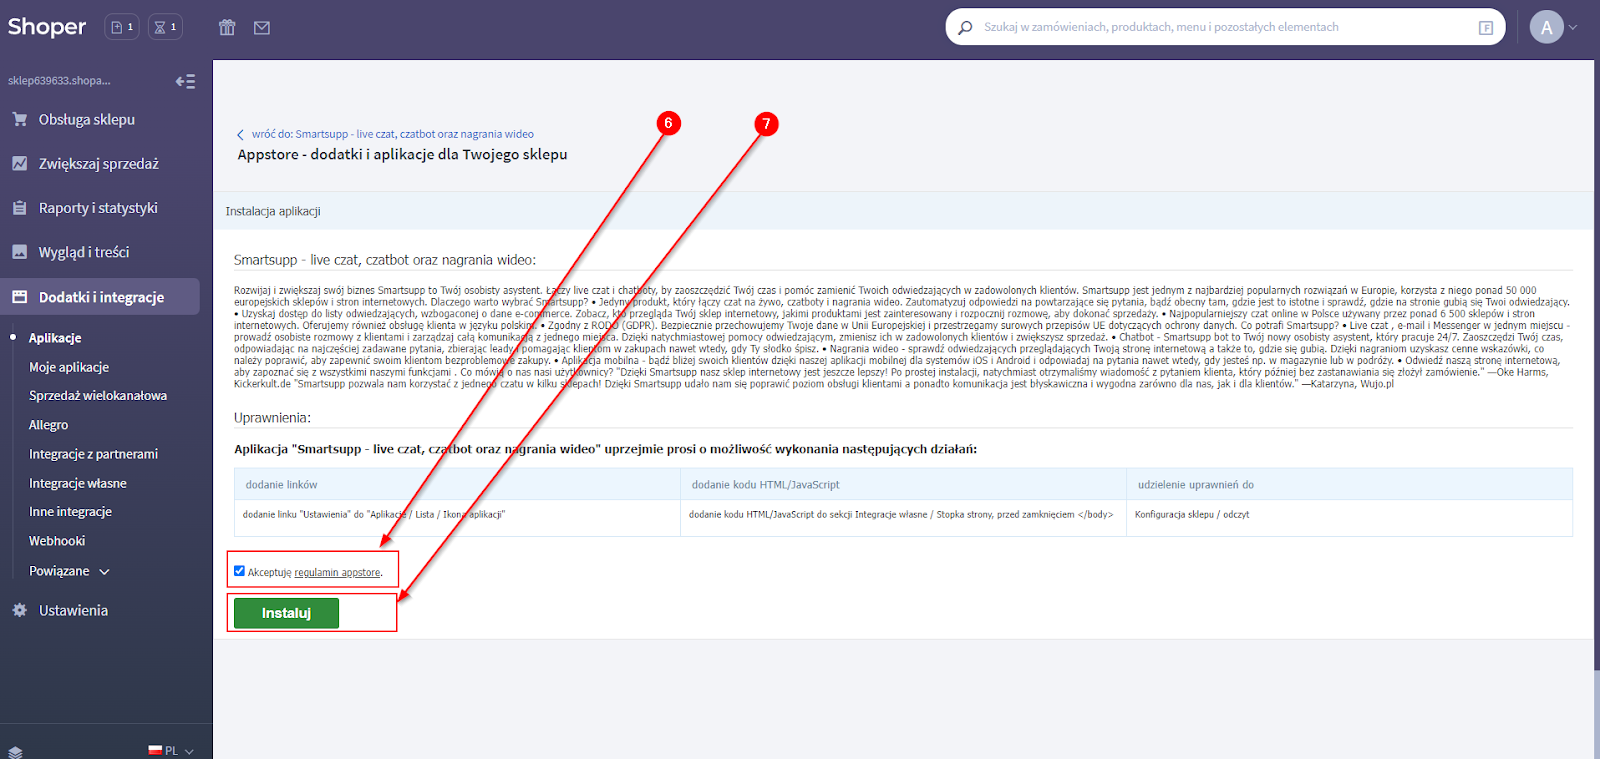
Click the Install application button.

Accept the App Store Terms & Conditions, then click Install.
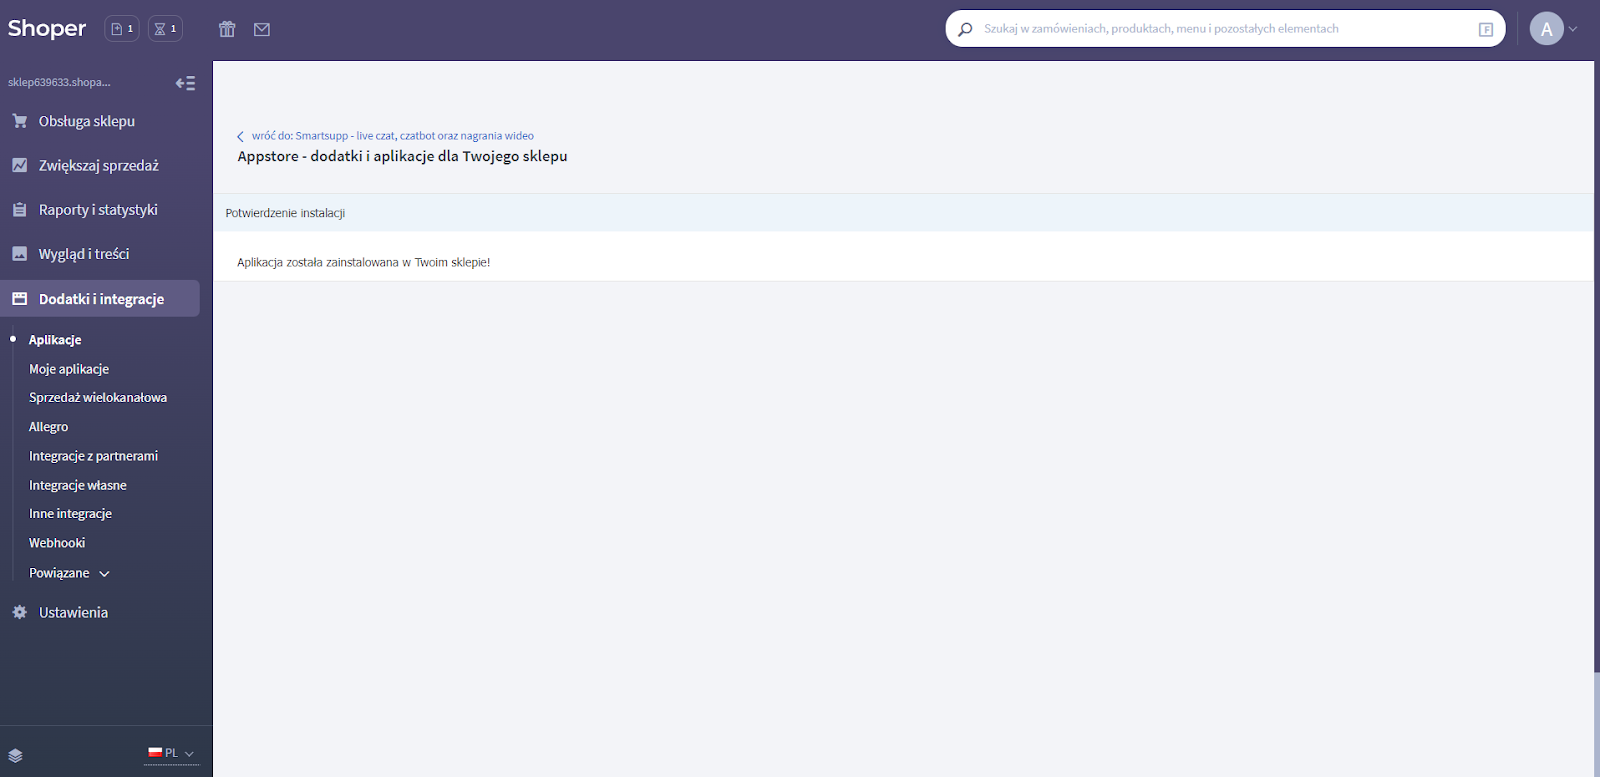
You'll see a confirmation message that the Smartsupp plugin was successfully installed.
Configure Smartsupp
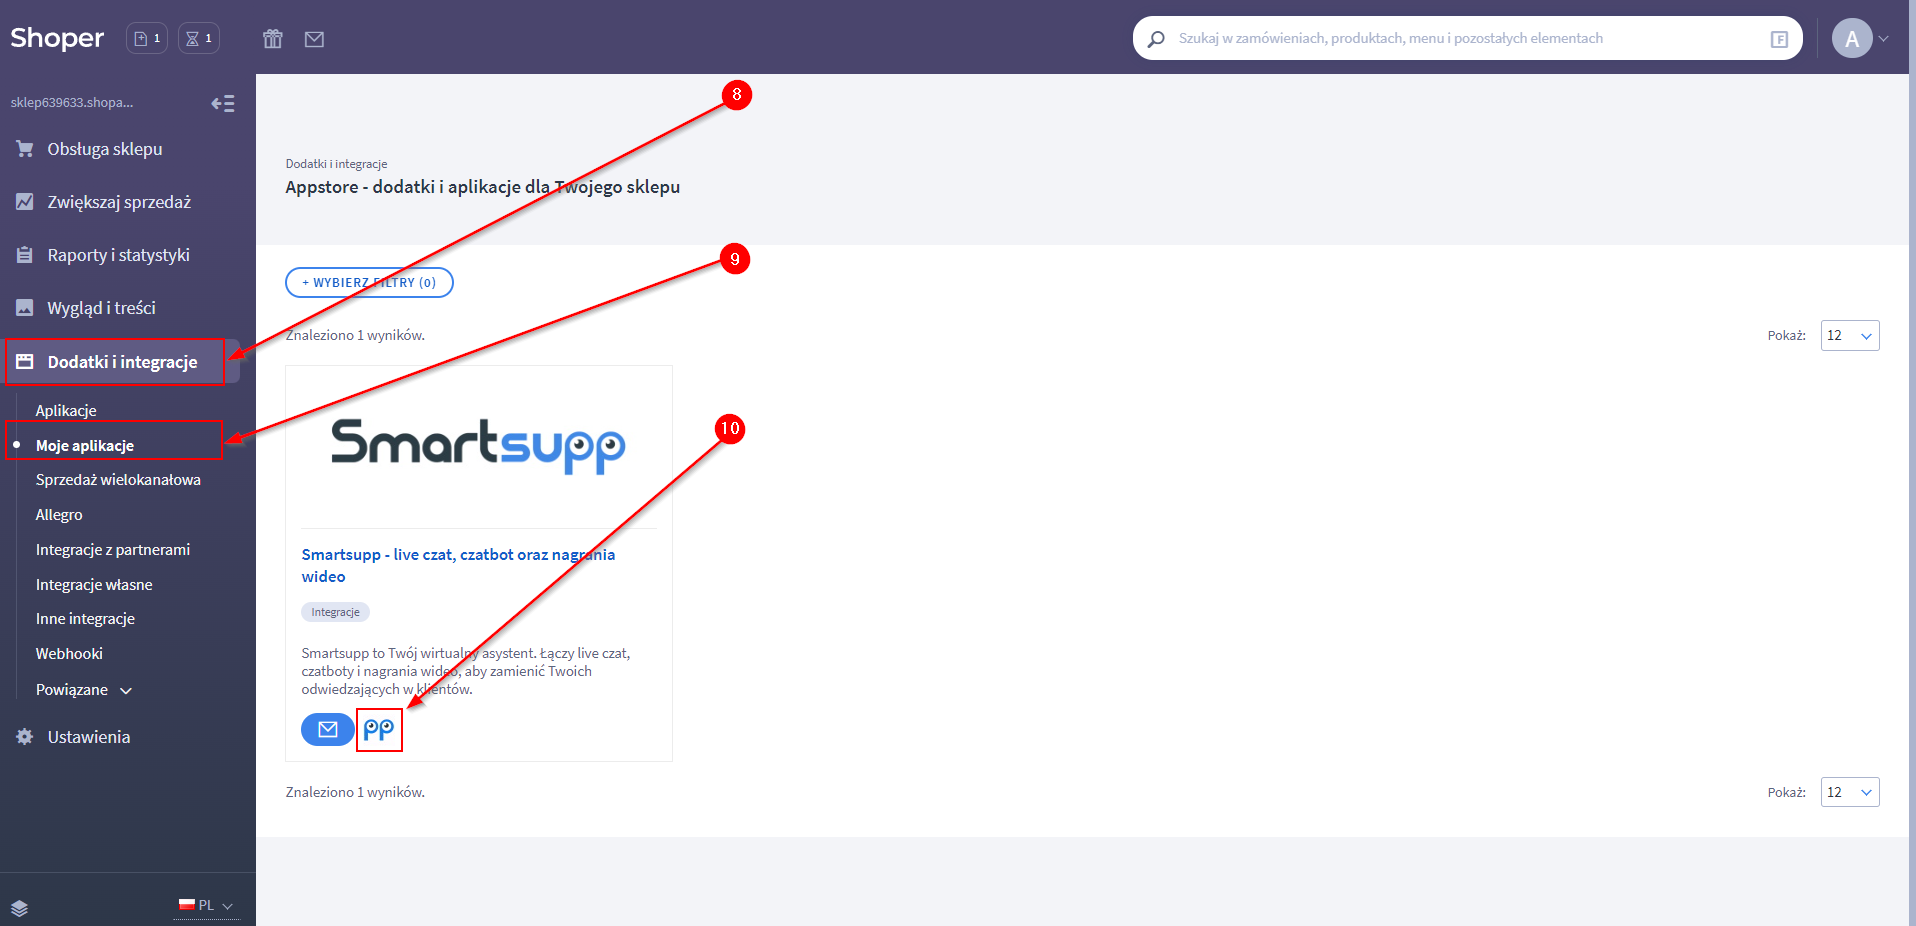
After installation, go to Add-ons and integrations > My applications and click on the Smartsupp icon.
You can either create a new Smartsupp account or log in to your existing one to connect it with your Shoper store.

Once connected, you can start chatting with your visitors or adjust Smartsupp settings using the Smartsupp API. Don't forget to save your changes.

Tip: After saving, open your store in a new tab and refresh the page — the Smartsupp chat widget should now be visible.
Manual code installation
If the plugin installation doesn't work, you can add the Smartsupp code manually as a JavaScript snippet.
Copy the chat code
Find your unique Smartsupp chat code in the dashboard under Settings > Channels > Live chat > Installation > Insert code.
Paste the code in Shoper
In Shoper, go to the JavaScript snippet section and paste your Smartsupp code. Make sure to remove the <script> and </script> tags — Shoper doesn't accept HTML tags in this field.
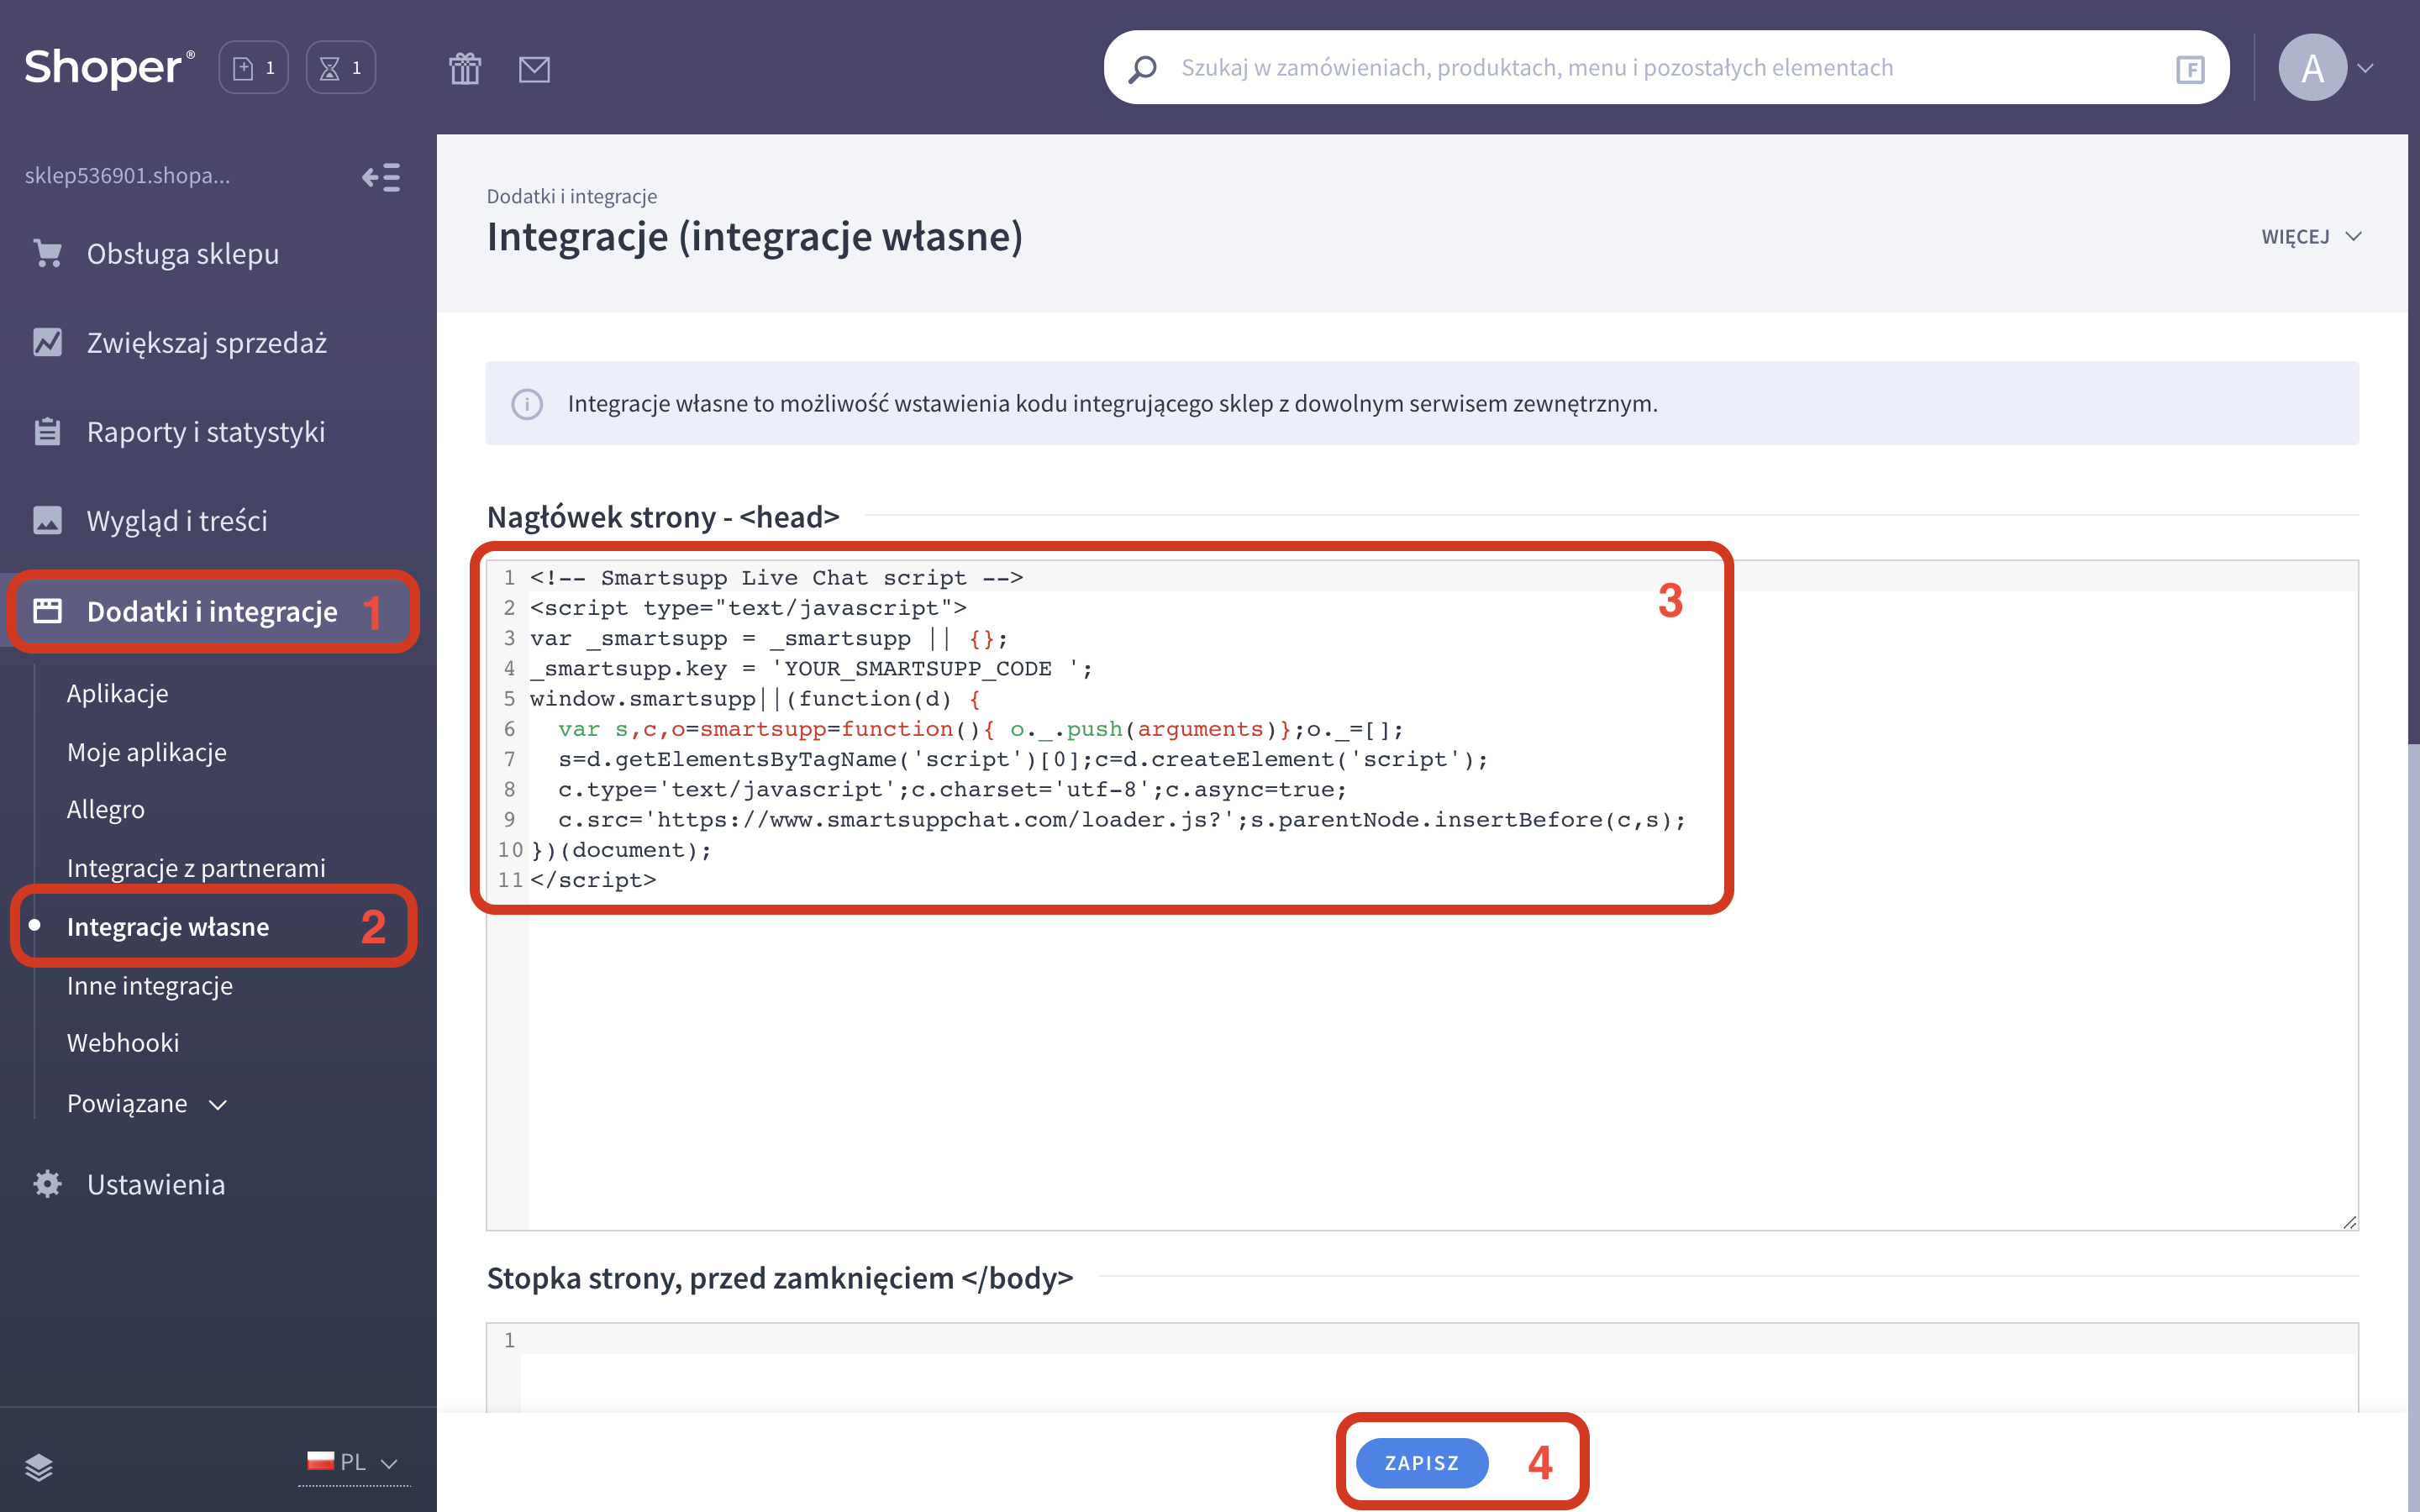
Note: The JavaScript field in Shoper may have a character limit, so keep the code as short as possible. Avoid using // comments, as Shoper may treat them as non-functional. After pasting, refresh your browser to see the changes.
API customization
You can use the Smartsupp JavaScript API to customize the chat widget behavior on your Shoper store. Here are some common examples:
Open the chat widget from a custom button:
<button onclick="smartsupp('chat:open')">Chat with us</button>
Hide the chat widget on specific pages (e.g. cart or checkout):
if (location.pathname.startsWith('/cart') || location.pathname.startsWith('/checkout')) { _smartsupp.hideWidget = true; }
Hide the default chat button and keep it hidden after closing:
smartsupp('chat:hide'); smartsupp('on', 'chat:close', function() { smartsupp('chat:hide'); });
Note: The JavaScript field in Shoper may have a character limit and does not support // comments. Keep your code short and avoid HTML tags like <script>.
Uninstall the plugin
If you need to uninstall the Smartsupp plugin, go to Add-ons and integrations > My applications and click on the Smartsupp app.
Click Uninstall the app.

Confirm the uninstallation.

Note: Smartsupp and Shoper are two separate services. Uninstalling the plugin does not cancel your Smartsupp subscription. To cancel it, please contact our support team.
Related resources:
Smartsupp installation — complete overview of all installation methods.
Google Tag Manager — alternative installation method with GTM.
What's next?
Basic chat box settings — Customize colors, position, welcome messages, and more.
Chat box status — Learn how the chat widget status works and how to control it.
Why can't I see the chat on my website? — Troubleshoot the most common installation issues.
Download plugins — Explore all available platform integrations.